[ « Back to Table of Contents ]
The Page Editor: Working with Images
Although it is not absolutely required, some image preparation is a good rule of thumb before uploading images to the Editor. It is always best to start out with a web-optimized image. Guides for Creating Web Images »
If however, you do not know how to optimize an image for web that's ok. Just keep in mind that when starting out with a large high resolution image, it may take a while to upload. Once the image has been uploaded, you can resize the image using the Edit tool in the Image Manager.
Upload an Image
Place your cursor on the line where you would like the top of the image to be placed.
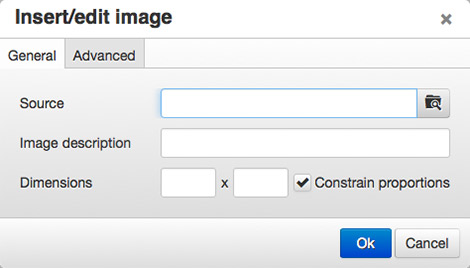
Click on the Insert/Edit Image Icon![]() in the Editor control panel. This will prompt the Insert/edit Image pop-up, shown below.
in the Editor control panel. This will prompt the Insert/edit Image pop-up, shown below.
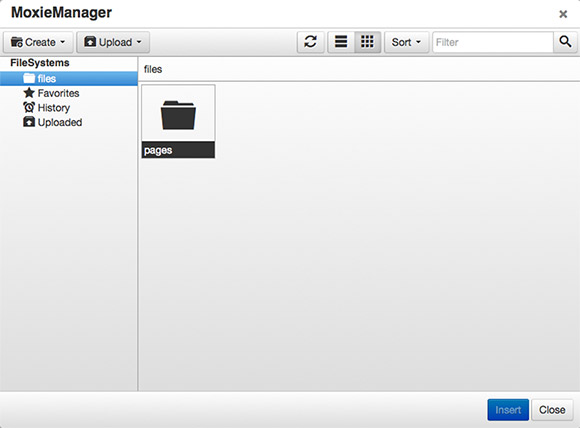
Click the Browse Icon ![]() next to the Image URL field to open the Image Manager, shown below.
next to the Image URL field to open the Image Manager, shown below.
Click on the Upload Icon ![]() in the top toolbar of the Image Manager to open the Upload popup window, shown below.
in the top toolbar of the Image Manager to open the Upload popup window, shown below.
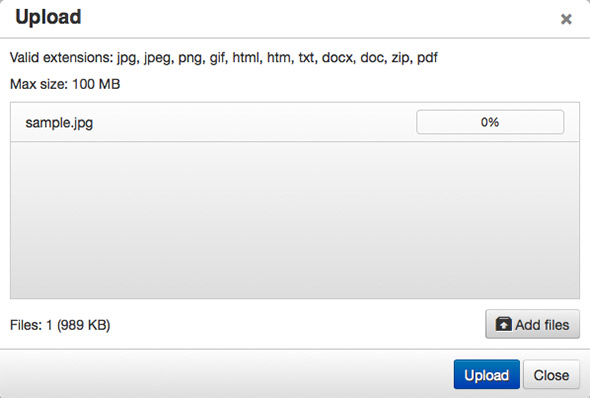
NOTE: The upload tool requires the installation of a plugin called Silverlight. The browser may prompt you to install this. If you do not wish to install Silverlight or if you are having trouble uploading, click on the basic uploader link and upload one image at a time using the basic uploader tool, shown below.
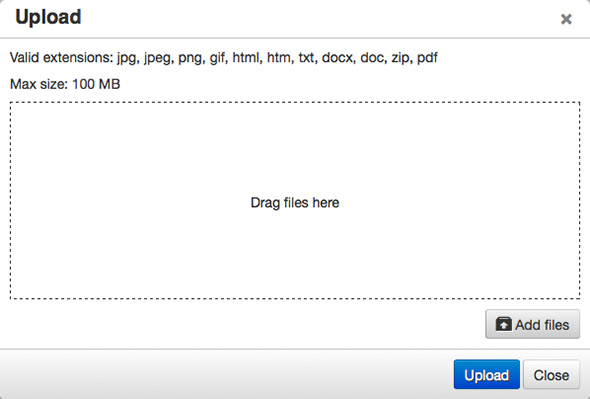
If using the Silverlight uploader follow the steps below:
Click on the Choose Files button to select one or more images to upload (hold down the command key to select multiple images).
The images that have been selected will appear in a list of files, offering the option to remove image files from the list or to add more images to the list. The uploader allows for up to 10MB of data to be uploaded at once.
Click the Upload to Server button to upload the image(s) to the database. It may take a few minutes depending on the size of the file. Once the upload is complete a thumbnail for each image will appear in the Image Manager.
Images must meet the following file requirements:
- Valid extensions: gif, jpg, png
- Max upload size: 10 MB
Working with the Image Manager
The Image manager is a robust tool that allows users to organize, edit, and insert images into the body of a webpage.
Organize the Image Library with Folders
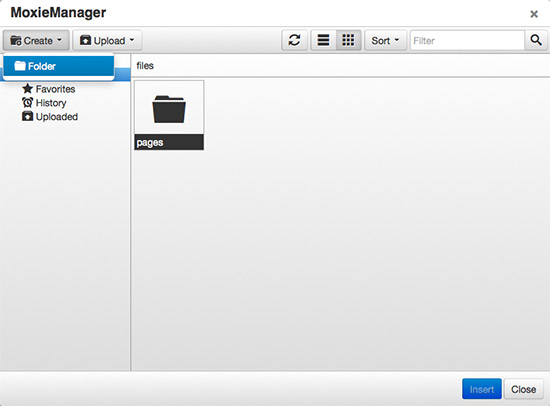
Create folders to organize the image library by clicking on the Create Folder Icon in the top toolbar of the Image Manager. Name the folder and click Create. You will see the list of Folders appear in the left sidebar of the Image Manager. Click on a folder name to open the folder before uploading images.
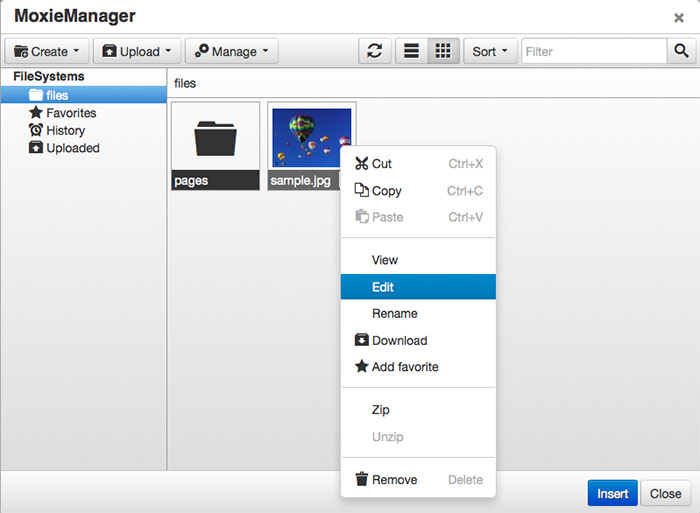
Each image thumbnail in the image library has an arrow button in the lower right corner, next to the files name. Click the arrow button to reveal the image options menu for the image, shown below.
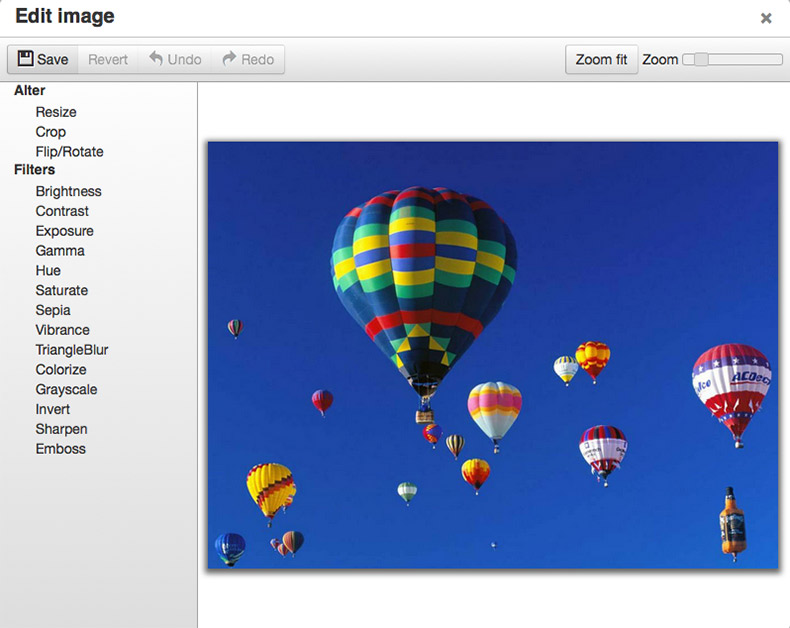
Once the image has been edited the Save and Revert Icons will be clickable. Click Save to update the image file, or click Revert to undo all changes. ![]()
Insert an Image
To insert an image simply click the thumbnail or click on the arrow icon below the thumbnail and select Insert from the menu. The Insert/Edit popup will open up displaying a preview of the image with image path in the Image URL field, shown below. It is good practice to add an Image description for improved Search Engine Optimization.
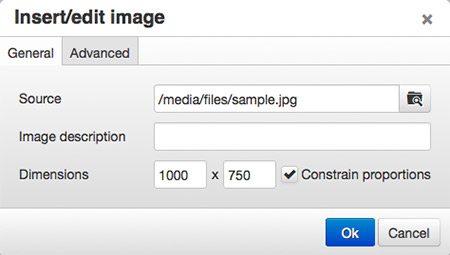
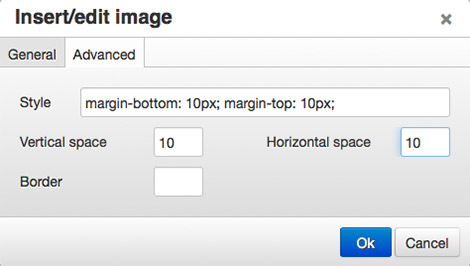
Image Appearance Properties
Click on the Appearance tab to adjust the image layout properties.
The image appearance properties include:
- The Alignmnent drop down menu has several options, but typically users only use either Right or Left alignment.
- Dimensions - Enter the desired width and as long as Constrain proportions is checked the Image Manager will do the math and adjust the height accordingly. NOTE: You may also resize an image after it has been inserted. Click to select the image. Hold the Shift key and the corner to resize visually.
- Vertical space adds a padding on the top and bottom of the image. Measured in pixels.
- Horizontal space adds a padding on the left and right of the image. Measured in pixels.
- Border is measured in pixels and will add a black border around the image.
- The Style field is where the css styling code that gets generated as you define the properties described above. If you are familiar with css, you may add styles to the image using this field.
Once you have defined the appearance properties, click Insert to insert the image into the Editor.